
Karaage Bento

Let’s go on a delightful bento picnic
Summertime calls for outdoor adventures and joyful family moments. One perfect way to celebrate the season is by embarking on a delightful picnic with a homemade bento. Imagine a picturesque park, a cozy blanket spread out on the grass, and a colorful bento box filled with mouthwatering Japanese delicacies. In this blog post, I share how to create the three beloved bento recipes: Karaage, Tamagoyaki, and Onigiri.

Part 1: Karaage - Crispy and Flavorful Fried Chicken Bites
These bite-sized Japanese-style fried chicken pieces are bursting with flavor and guaranteed to be a hit with everyone. It’s one of the most popular bento items, and yet it is simple to make.
Ingredients: (3-4 servings)
1 lb boneless chicken thighs, cut into bite-sized pieces
2 cloves minced garlic
1/2 tbsp grated ginger
2 tbsp sake
2 tbsp soy sauce
1/2 tbsp sesame oil
1/2 cup potato starch
1/3 cup all-purpose flour
vegetable oil, for frying
Instructions:
In a bowl, add the chicken pieces, combine with garlic, ginger, soy sauce, sake, and sesame oil. Allow them to marinate for at least 30 minutes or refrigerate overnight for more intense flavors.
In a separate bowl, combine the potato starch and all-purpose flour.
Heat vegetable oil in a deep pan or skillet over medium heat.
Take each marinated chicken piece, allowing any excess marinade to drip off, and coat it in the potato starch and flour mixture.
Shake off any excess coating and carefully place the chicken pieces into the hot oil.
Fry the chicken in batches until they turn golden brown and crispy. This usually takes around 4-5 minutes per batch.
Once fried, transfer the Karaage to a plate lined with paper towels to drain any excess oil.


Part 2: Tamagoyaki - A Rolled Egg Omelette
Tamagoyaki, a delicate rolled egg omelette, adds a touch of elegance and richness to the bento box. This sweet and savory delight is simple to make but brings a burst of flavor to every bite.
Ingredients: (2 servings)
2 pcs egg
a pinch of sugar
cooking oil
Instructions:
In a bowl, beat the eggs thoroughly until the yolks and whites are well combined, then add some sugar.
Heat a non-stick frying pan or Tamagoyaki pan over medium-low heat.
Add a small amount of cooking oil to the pan and spread it evenly.
Pour a thin layer of the egg mixture into the pan, gently roll it from one end of the pan to the other using chopsticks or a spatula.
Push the rolled layer to the far end of the pan and add another layer of the egg mixture. Lift the rolled layer slightly to allow the new layer to flow underneath.
Repeat the rolling and adding layers until all the egg mixture is used.
Once the Tamagoyaki is cooked through and has a slightly golden color, transfer it to a cutting board, slice it into bite-sized pieces after the Tamagoyaki cools down for a few minutes.


Part 3: Onigiri - Adorable Rice Balls
Onigiri, those cute and compact rice balls, are a staple of Japanese bento dish. With their soft and fluffy cooked rice, and simple salted flavor, they are a fantastic addition to any bento picnic.
Ingredients: (2 pcs)
1 cup cooked rice
salt
nori seaweed
fillings of your choice (e.g., salmon, tuna, pickled plum) if desired
Instructions:
While the rice is freshly cooked and still warm, transfer it to a bowl, divide the rice into equal portions.
Wet your hands with water, sprinkle a pinch of salt over the palms, scoop a portion of rice.
If you had a filling, flatten the rice, add the filling in the center of the rice.
Gently fold the rice, shape it into a triangular.
Wrap each Onigiri with a strip of Nori seaweed


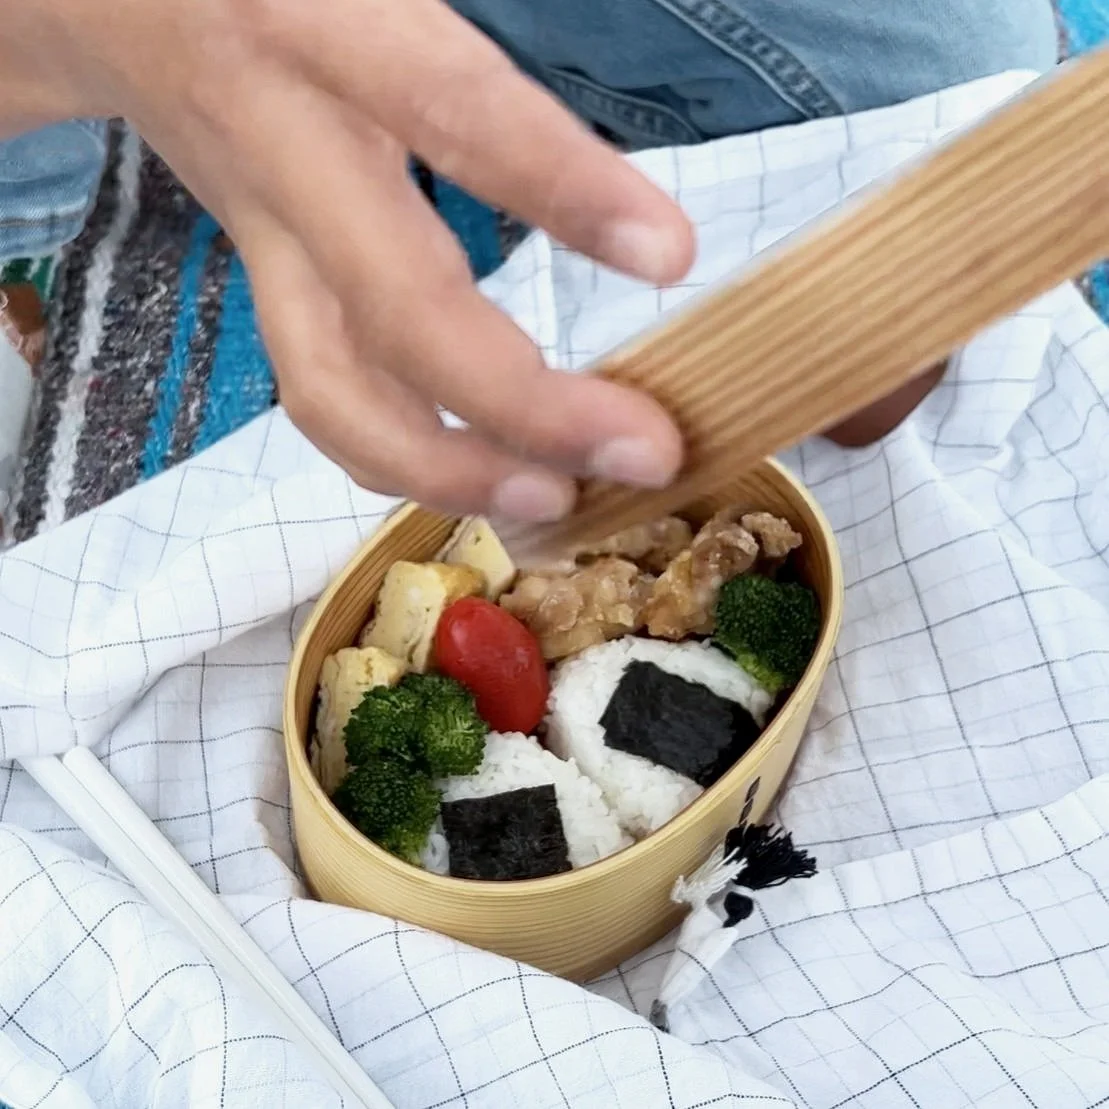
Packing Bento tips:
For this particular Karaage Bento - Start packing the bento with sturdy items such as Onigiri. Starting with the starch items is perfect for the base layer, then add Karaage and Tamagoyaki which can withstand the weight of other components and won't leak or make the box soggy. Finally fill in the space with vegetables such as boiled broccoli and mini tomatoes. I normally place the most bright color in the middle, if not spread the colors evenly over the bento for the appealing presentation.
Generally, planning the menu in advance is helpful. Consider a balance of flavors, nutritions, and colors to create a visually appealing and satisfying meal. My choice is normally with 1 grain item, 1-2 proteins and 1-2 vegetables. Adding fruits will conclude the meal with refreshing taste, too.
Keep it cool and fresh. Food safety is essential, especially for picnics or when packed lunches are left at room temperature. Keep your bento cool by using ice packs or freeze a water bottle overnight and place it in your lunch bag. Pack perishable items separately, or consider using insulated containers to maintain the desired temperature. Ensure to cool the most bento items before covering and wrapping the box.
Get creative with presentation! There is no right or wrong rules for packing the bento. Arrange the food in visually appealing patterns or shapes. Use colorful ingredients, food picks, edible garnishes, or cute silicone cupcake liners to add an extra touch of charm.


